Lesson 2. How to create an R Markdown File in R Studio and the R Markdown File Structure
Getting Started
Let’s dive deeper into the R Markdown file format. This tutorial will introduce
you to working with R Markdown files in R and R Studio. You will create an
R Markdown file and render it to html using the knitr package.
Learning Objectives
At the end of this activity, you will:
- Know how to create an
R Markdownfile inRStudio. - Be able to write a script with text and
Rcode chunks. - Create an
R Markdowndocument ready to be ‘knit’ into anhtmldocument to share your code and results.
What You Need
You will need the most current version of R and, preferably, RStudio loaded on
your computer to complete this tutorial.
Install R Packages
- knitr:
install.packages("knitr") - rmarkdown:
install.packages("rmarkdown")
Create a New R Markdown File in RStudio
Watch the 6:38 minute video below to see how you convert
an R Markdown file to html (or other formats) using knitr in RStudio.
NOTE: The text size in the video is small so you may want to watch the video in
full screen mode.
Create Your .Rmd File
Now that you see how R Markdown can be used in RStudio, you are
ready to create your own .Rmd document. Do the following:
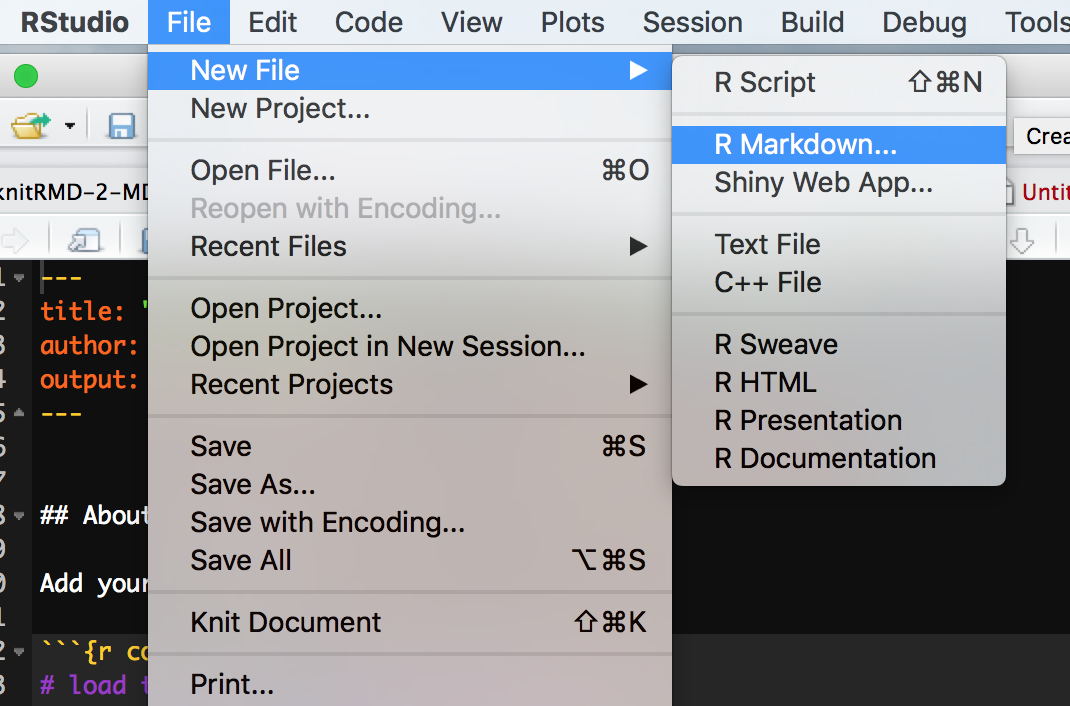
- Create a new
R Markdownfile and choosehtmlas the desired output format. - Enter a Title (Earth Analytics Week 1) and Author Name (your name). Then click OK.
- Save the file using the following format: FirstInitial-LastName-document-your-science/.Rmd NOTE: The document title is not the same as the file name.
- Hit the `Knit HTML` drop down button in
RStudio(as is done in the video above). What happens?
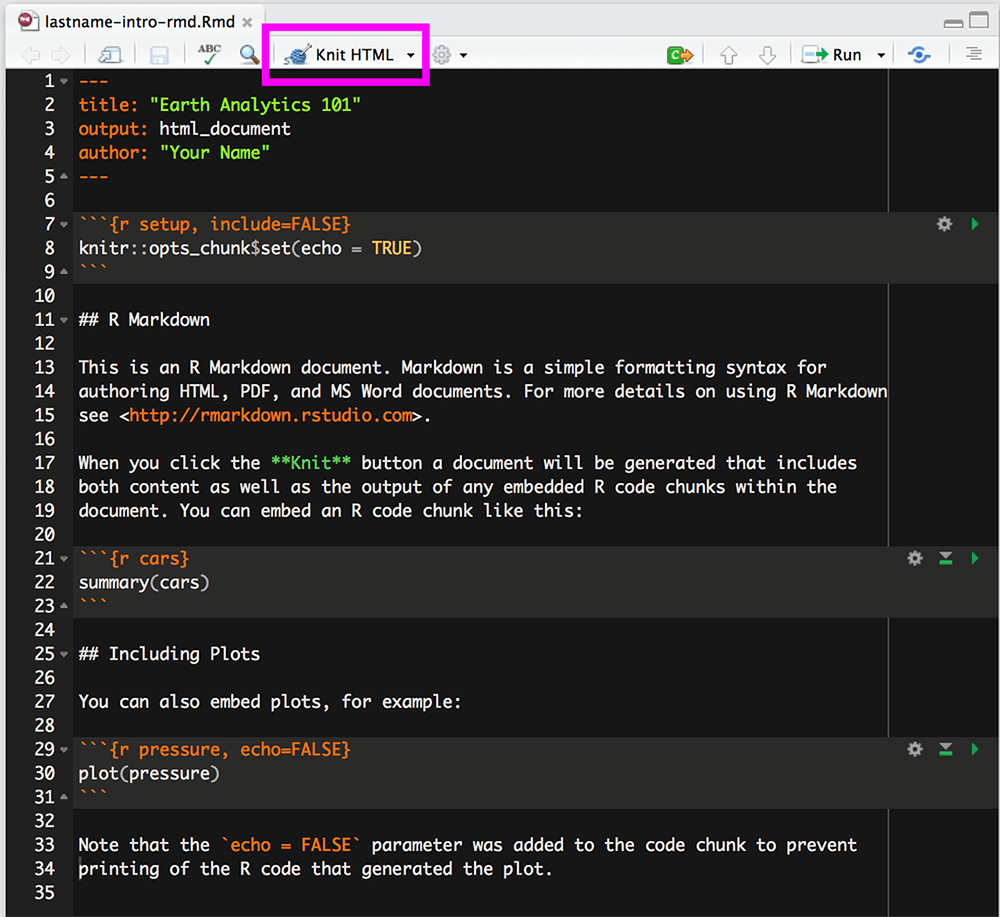
If everything went well, you should have an html format (web page) output
after you hit the knit button. Note that this html output is built from a
combination of code and text documentation that was written using markdown syntax.
Don’t worry if you don’t know what markdown is. You will learn that in the next lesson.
Next, let’s break down the structure of an R Markdown file.
The Structure of an R Markdown File
``` and 3. Text written using markdown syntax.
Data Tip: Screenshots on this page are
from RStudio with appearance preferences set to Twilight with Monaco font. You
can change the appearance of your RStudio by Tools > Options
(or Global options depending on the operating system). For more, see the
Customizing RStudio page.
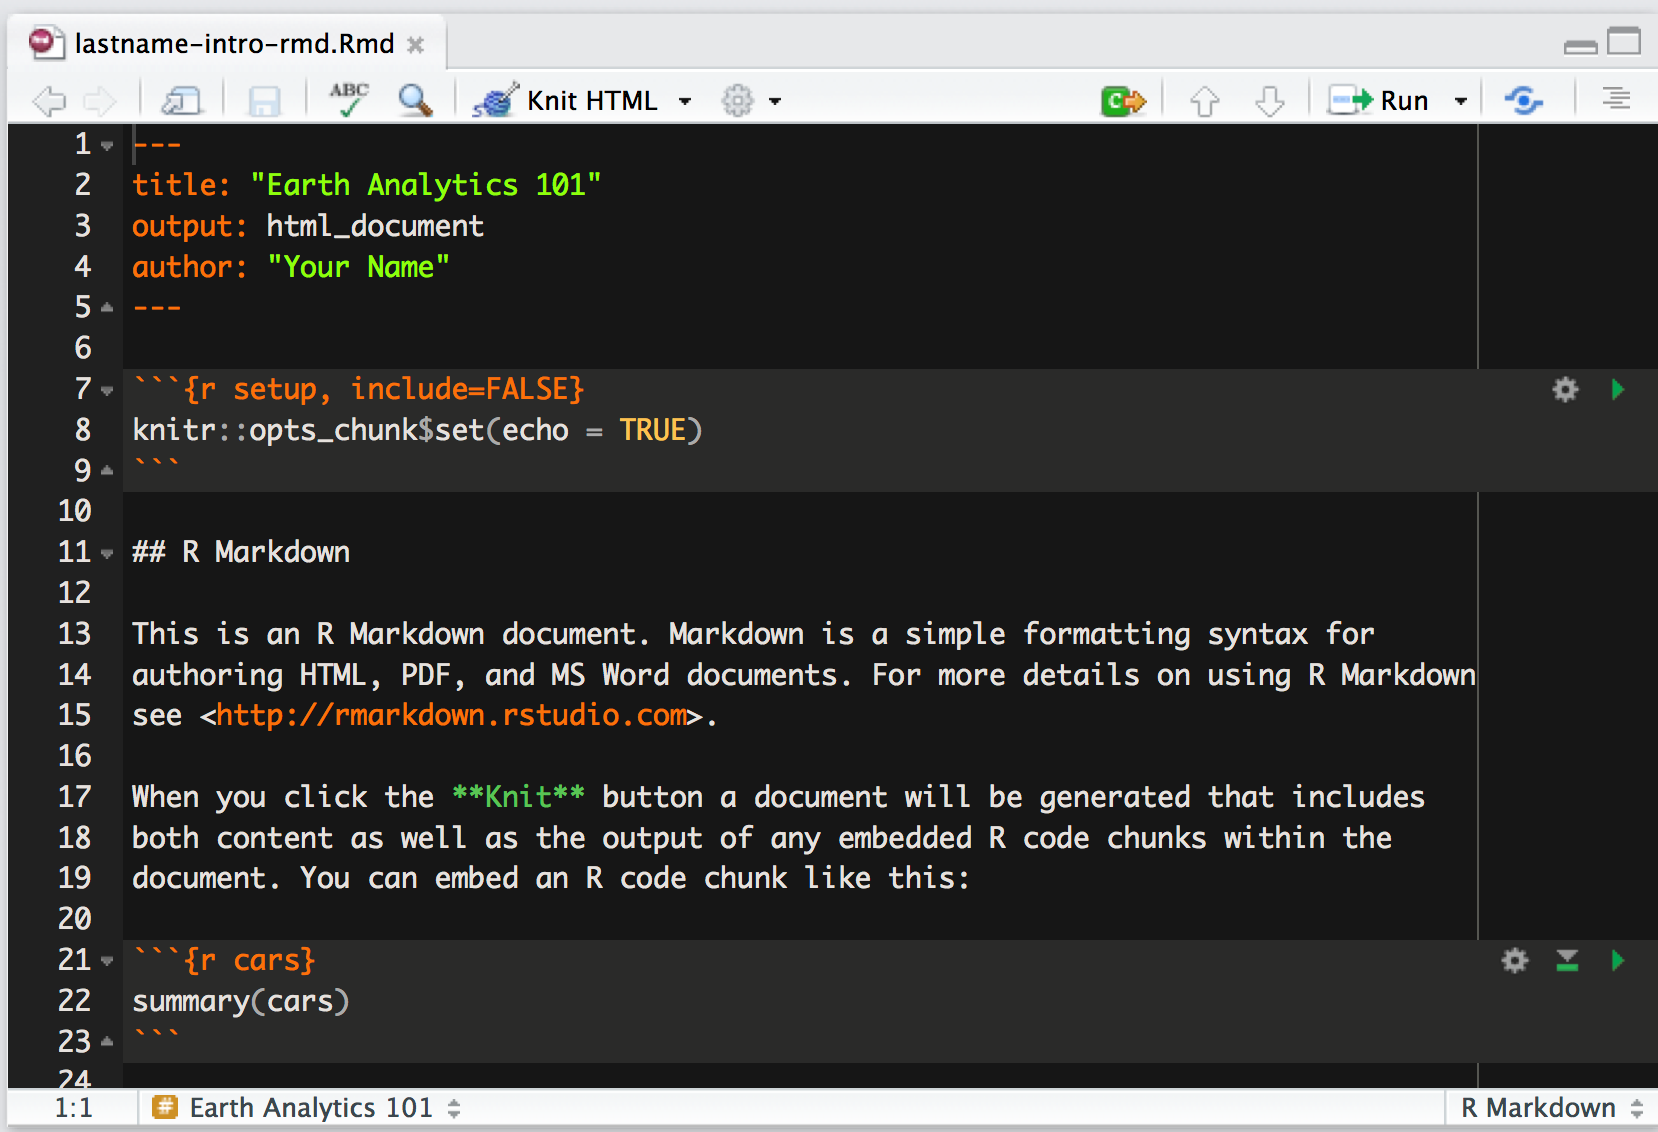
There are three parts to an .Rmd file:
- Header: The text at the top of the document, written in YAML format.
- Markdown sections: Text that describes your workflow written using markdown syntax.
- Code chunks: Chunks of
Rcode that can be run and also can be rendered usingknitrto an output document.
Next, let’s break down each of the parts listed above.
YAML Header (front matter)
An R Markdown file always starts with a header written using
YAML syntax.
This header is sometimes referred to as the front matter.
There are four default elements in the RStudio YAML header:
- title: The title of your document. Note, this is not the same as the file name.
- author: Who wrote the document.
- date: By default this is the date that the file is created.
- output: What format will the output be in. You will use
html.
Note that a YAML header begins and ends with three
dashes ---. Also notice that the value for each element, title, author, etc,
is in quotes "value-here" next to the element. A YAML header may be structured
differently depending upon how your are using it. Learn more on the
R Markdown documentation page.
Example YAML header in an RStudio R Markdown file:
---
title: "title"
author: "Your Name"
date: "December 4, 2016"
output: html_document
---
R Markdown Text & Markdown Blocks
The second part of a R Markdown document is the markdown itself which is used
to add documentation to your file (or write your report). You will learn markdown
in the next tutorial.
Activity: Customize Your R Markdown File’s Front Matter - YAML
Customize the header of your .Rmd file as follows:
- Title: Provide a title that fits the code that will be in your RMD.
- Author: Add your name here.
- Date: Today’s date.
- Output: Leave the default output setting:
html_document.You will be rendering anhtmlfile.
Share on
Twitter Facebook Google+ LinkedIn
Leave a Comment