Lesson 3. Code and Markdown Cells in Jupyter Notebook
Learning Objectives
After completing this page, you will be able to:
- Create new Code and
Markdowncells withinJupyter Notebook. - Run Code and
Markdowncells withinJupyter Notebookto executePythoncode and renderMarkdowntext. - List useful shortcuts for common tasks in
Jupyter Notebook.
Work With Python Code and Markdown Cells in Jupyter Notebook
Recall that a Jupyter Notebook file consists of a set of cells that can store text or code.
- Text Cells: Text cells allow you to write and render
Markdownsyntax. This is where you can describe and document your workflow. - Code Cells: Code cells allow you to write and run programming code (e.g.
Python).
Create New Cells
You can use either the Menu tools or Keyboard Shortcuts to create new cells.
| Function | Keyboard Shortcut | Menu Tools |
|---|---|---|
| Create new cell | Esc + a (above), Esc + b (below) | Insert→ Insert Cell Above OR Insert → Insert Cell Below |
| Copy Cell | c | Copy Key |
| Paste Cell | v | Paste Key |
While the default cell type for new cells is Code, you can change the cell type of any existing cell by clicking in the cell and selecting a new cell type (e.g. Markdown) in the cell type menu in the toolbar.
Cell type options include Code, Markdown, Raw NBConvert (for text to remain unmodified by nbconvert), and Heading.
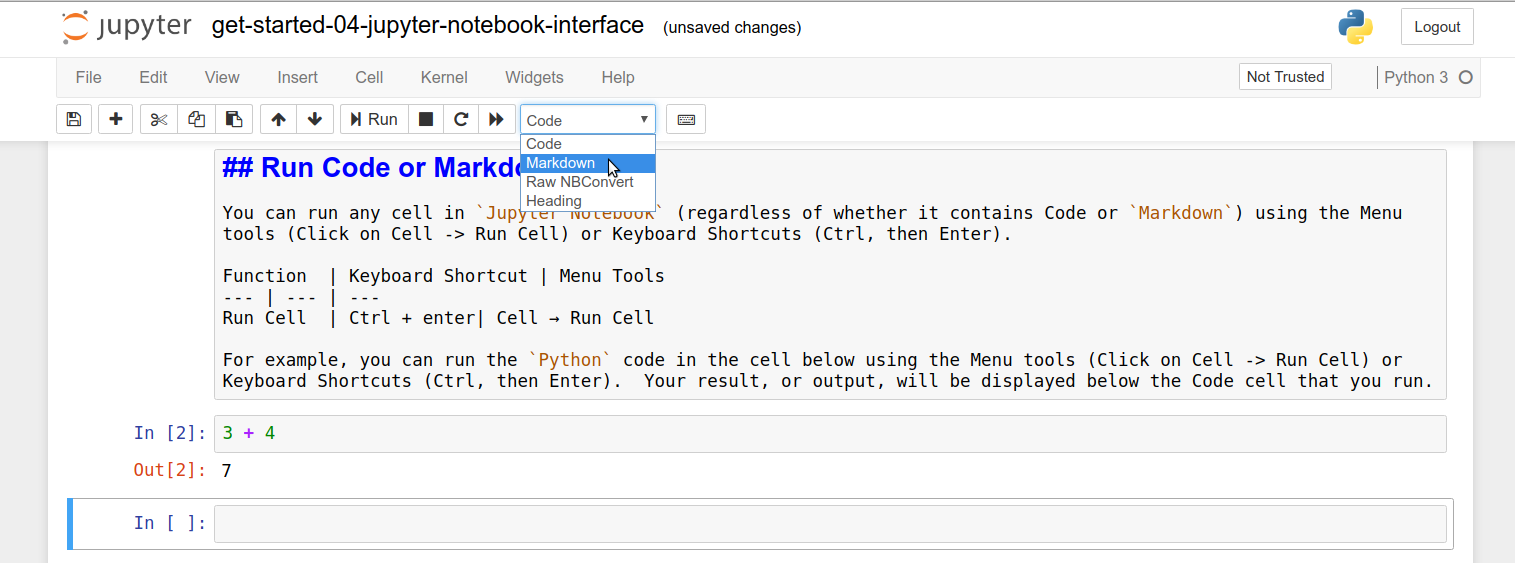
To use the Keyboard Shortcuts, hit the esc key. After that, you can change a cell to Markdown by hitting the m key, or you can change a cell to Code by hitting the y key.
Run Cells
Python Code Cells
You can run any cell in Jupyter Notebook (regardless of whether it contains Code or Markdown) using the Menu tools or Keyboard Shortcuts.
| Function | Keyboard Shortcut | Menu Tools |
|---|---|---|
| Run Cell | Ctrl + enter | Cell → Run Cell |
For example, you can add a new Code cell and then run the following Python code (e.g. 3 + 4). Your result, or output, will be displayed below the Code cell that you run.
3 + 4
7
Markdown Cells
You can run Markdown cells in the same way that you can run code cells. However, when you run a Markdown cell, the text formatted using Markdown syntax will be rendered as stylized text.
This means that headings are larger and bold, bulleted lists have bullets next to them instead of *, and regular text looks normal. No outputs will appear below the Markdown cell.
For example, the Markdown syntax below represents 3 headers. You can double-click in any Markdown cell to see the raw Markdown syntax, which for the cell below would appear like this raw Markdown syntax:
### This is a subtitle in Markdown

#### This is a smaller subtitle

##### This is an even smaller subtitle
To see the Markdown as stylized text, run the cell. It should look like the text printed below:
This is a subtitle in Markdown
This is a smaller subtitle
This is an even smaller subtitle
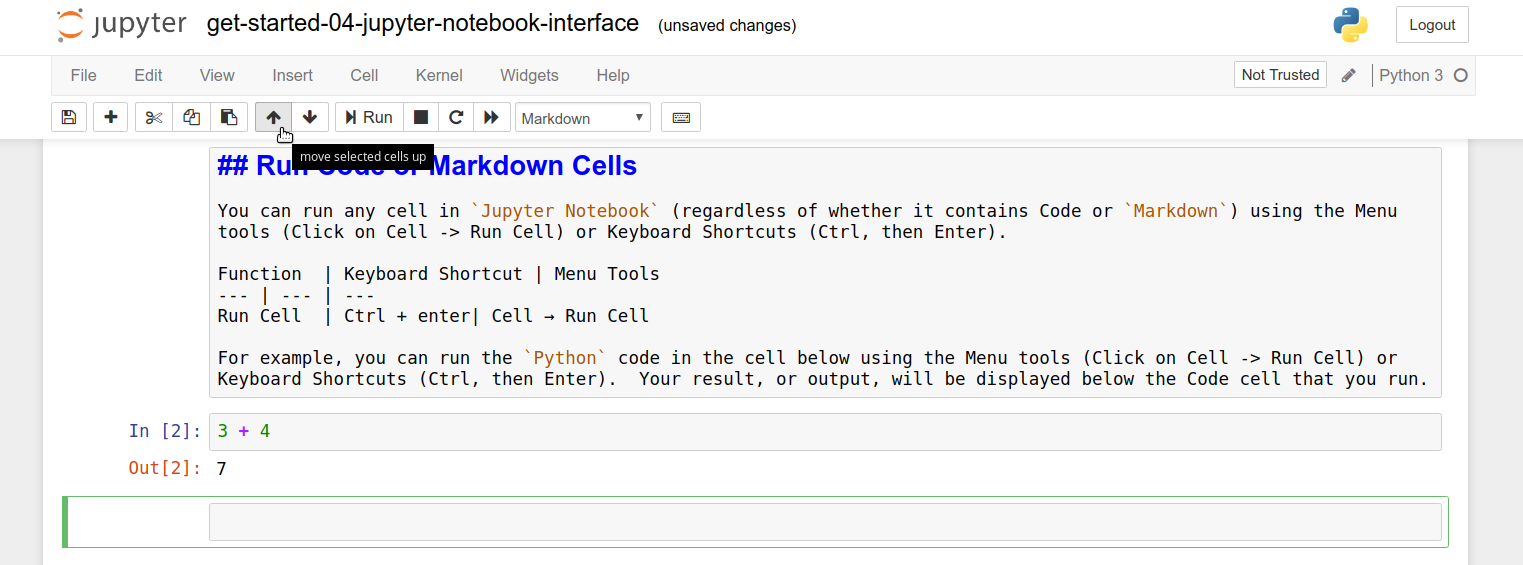
Rearrange Cells in a Jupyter Notebook
You can change the order of cells within Jupyter Notebook using the up arrow and down arrow buttons on the menu bar. To do this, click inside the cell that you want to move and then press the desired arrow as many times as you need to move the Cell to the desired location.
Clear Results in Jupyter Notebook
Sometimes, you may want to clear any output results that have been produced. You can do this using the Menu:
| Menu Tools |
|---|
| Cell -> Current Outputs -> Clear |
This will clear the current cell that you are working in, which you can activate by clicking in a cell.
You can also clear all of the output using the Menu Tools.
| Menu Tools |
|---|
| Cell -> All Output -> Clear |
Share on
Twitter Facebook Google+ LinkedIn
Leave a Comment