Lesson 1. Introduction to Jupyter For Python
Jupyter For Python - Intro to earth data science textbook course module
Welcome to the first lesson in the Jupyter For Python module. This chapter teaches you how to use Jupyter Notebook, an interactive environment where you can write and run code such as Python and add text that describes your workflow using Markdown.Chapter Three - Introduction to Jupyter For Python
In this chapter, you will learn how using Jupyter Notebook can help you implement open reproducible science workflows and get familiar with the Jupyter Notebook interface to run and create new code and Markdown cells. You will also learn how to create new directories and files using Jupyter Notebook.
After completing this chapter, you will be able to:
- List the components and functionality of
Jupyter Notebookand explain how it supports open reproducible science. - Launch and navigate the
Jupyter Notebookdashboard. - Open and create
Jupyter Notebookfiles (.ipynb). - Run code and
Markdowncells withinJupyter Notebookto executePythoncode and renderMarkdowntext. - Manage directories and files using
Jupyter Notebook.
What You Need
Be sure that you have completed the instructions on Setting up Git, Bash, and Conda on your computer to install the tools for your operating system (Windows, Mac, Linux).
Jupyter Notebook for Open Reproducible Science
If you recall from Chapter One on Open Reproducible Science, Jupyter is an open source platform that contains a suite of tools including:
- Jupyter Notebook: A browser-based application that allows you to create and share documents (i.e. Jupyter Notebook files) that contain live code, equations, visualizations and narrative text.
- Jupyter Lab: A browser-based application that allows you to access multiple Jupyter Notebook files as well as other code and data files
- Jupyter Hub: A multi-person version of Jupyter Notebook and Lab that can be run on a server.
The Jupyter Notebook file format (.ipynb ) allows you to combine descriptive text, code blocks and code output in a single file. When you run the code, it generates the outputs, including plots and tables, within the notebook file. You can then export the notebook to a .pdf or .html that can then be shared with anyone.
This format is powerful as you can:
- Share the notebook itself with anyone who might want to run it and
- Convert the notebook to a PDF or HTML format that can be viewed like a report
You can use Jupyter Notebooks (.ipynb files) to document workflows and to share code for data processing, analysis and visualization.
Combine Markdown and Code in Jupyter Notebooks To Document Workflows
Using Markdown alongside code in Jupyter Notebooks has many advantages:
- Human readable: it’s much easier to read a web page or a report containing text and figures. By adding Markdown text around your code, your project becomes more user friendly and easier to understand.
- Simple syntax: Markdown uses simple formatting syntax that can be learned quickly. This reduces the learning curve for designing well-documented Jupyter Notebooks.
- Helpful Reminder for Your Future Self: When you code, consider your future self. If you leave your future self a well documented set of Jupyter Notebook files that both run your code and describe the steps, then all components of your work are clearly documented. You (and your future self)do not have to remember what steps, assumptions, or tests were used to complete the workflow.
- Easy to Modify: You can easily extend or refine analyses contained within a Jupyter Notebook file by modifying existing or adding new code blocks.
- Flexible export formats: Analysis results stored in Jupyter Notebook files can be disseminated in various formats including HTML, PDF and slideshows.
- Easy to share: If all of your analysis is contained and described in a one or more notebooks, it makes it easy to share with a colleague. Your colleague can also easily replicate your workflow.
Data Tip: You can easily create fully reproducible Jupyter Notebook files that can be run online using my binder.
Jupyter Notebooks Are Beneficial to Your Colleagues
The link between data, code and results makes Jupyter Notebook powerful. You can share your entire workflow with your colleagues and they can quickly see your process.
You can also write reports using .ipynb files which contain code and data analysis results. To enrich the document, you can add text, just like you would in a Word document that describes your workflow, discusses your results and presents your conclusions - alongside your analysis results.
Jupyter Notebooks Are Beneficial to You & Your Future Self
Jupyter notebooks (.ipynb) are efficient. If you need to make changes to your workflow, you can simply modify the code and run the report again. Your future self will appreciate it too.
Jupyter Notebooks allows you to add documentation to remind yourself of your process. Further, all of the code that you used is in the notebook ready to be rerun or modified at any time.
Data Tip: Many of the Earth Lab lessons, including this one, were created using Jupyter Notebooks!
Convert Notebooks to Shareable HTML Files
You can save Jupyter Notebooks containing code and markdown as .html files. When you save a notebook as .html, it creates a nicely rendered web page with the code and outputs visible along with the markdown rendered as nicely formatted text. This means that you can share the file with a colleague and they can see your entire workflow - without having to rerun your analysis. You will learn how how to export to .html and other formats later in this textbook.
What is Jupyter Notebook?
Jupyter Notebook is an Integrated Development Environment (IDE) that allows you to write code, navigate files on our computer, inspect variables and more.
An IDE is different from a text editor, as IDEs allow you to interactively write, test, and debug code.
While there are other commonly used Python IDEs such as Spyder (which comes with the Python Anaconda distribution) and PyCharm, in this textbook, you will use Jupyter Notebook as your IDE.
Advantages of Jupyter Notebook
Jupyter Notebook provides users with useful functionality including the ability to:
- Write and run code interactively.
- Document all aspects of a workflow using a combination of well-written programming code and text.
- Share work with colleagues who can see all of the code, the code outputs, and text explanation.
This functionality supports open reproducible science by facilitating documentation and collaboration on workflows.
Jupyter Notebook Makes Coding and Documentation More Efficient
Jupyter Notebook can help save your time:
- Shortcuts:
Jupyter Notebookhas different shortcuts for running cells, adding new cells and formatting the notebook to help save you time. - Autocomplete : Autocomplete is available to quickly find function names, arguments for those functions, and variables that are stored in your environment. This makes typing your code easier and less error-prone. Hitting the
tabbutton while typing will promptJupyter Notebookto help you complete the name of a variable or function that you want to call. - Markdown Integration: You can combine text and code in the same document. This allows you to document and explain the code you have written and make your workflow more reproducible.
Jupyter Notebook is also an open source product and free under the BSD 3-clause “New” or “Revised” License.
Components of Jupyter Notebook
The components of Jupyter Notebook include:
-
The Jupyter Notebook IDE The
Jupyter Notebookinteractive development environment (IDE) is the application that launches in a web browser like Firefox or Safari and is the environment where you write and run your code. -
Notebook Files (.ipynb) The notebook file (.ipynb) is a file type that you can use to store your
Pythoncode andMarkdowntext for individual projects and workflows. -
Kernels A kernel runs your code in a specific programming language.
Jupyter Notebooksupports over 40 different languages. In this class, you will use thePythonkernel within theJupyter NotebookIDE.
Structure of Jupyter Notebook Files
The Jupyter Notebook IDE allows you to organize and execute your work using individual Jupyter Notebook files with the file extension .ipynb.
A Jupyter Notebook file (.ipynb) has three main parts, which are highlighted in the image below:
- Menu bar
- Toolbar
- Cells
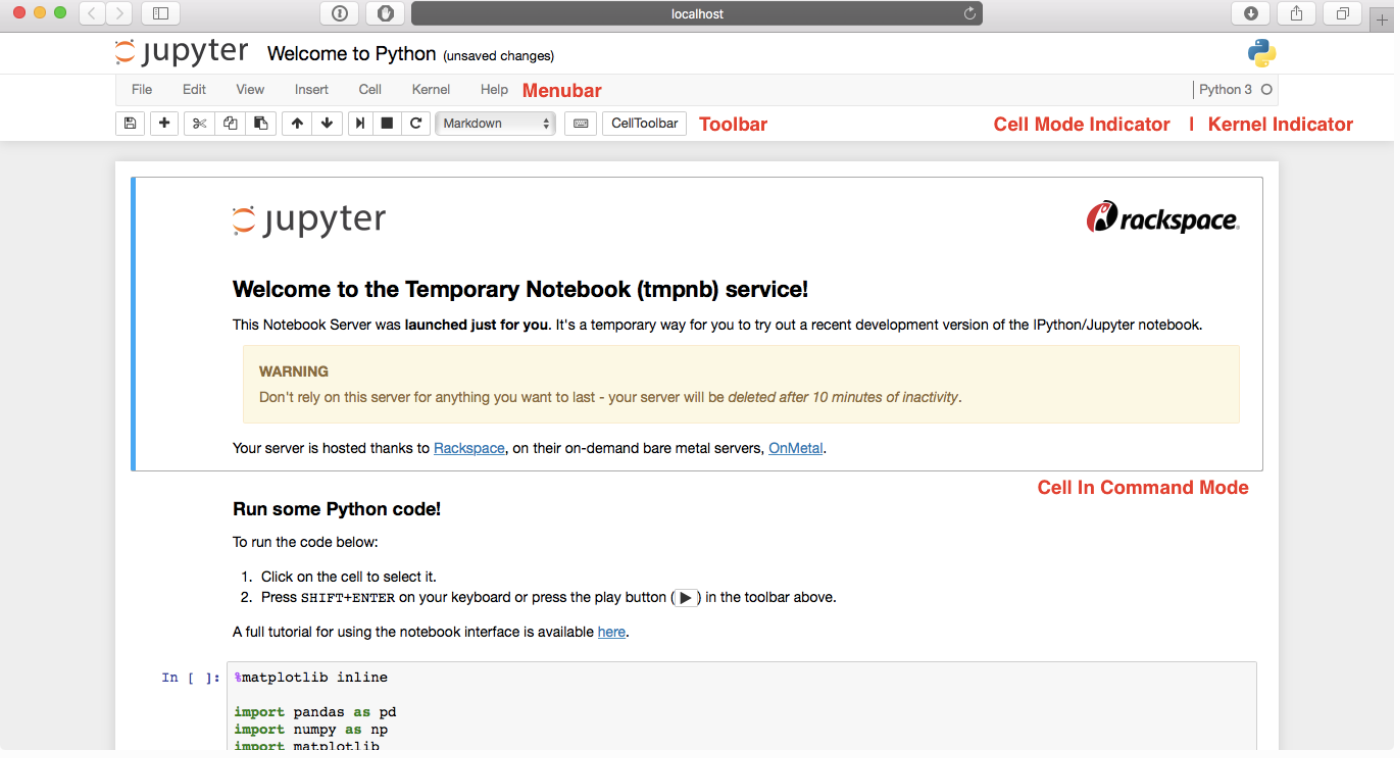
Throughout this chapter, you will review the menu and toolbar to complete different tasks within your Jupyter Notebook files such as saving changes, running code, etc.
Markdown and Code Cells in Jupyter Notebook
In addition to the menu and toolbar, a Jupyter Notebook consists of a set of cells, which can be specified to store documentation text such as Markdown or programming code such as Python.
Text written using the Markdown syntax can be rendered in a cell that is of the cell type Markdown.
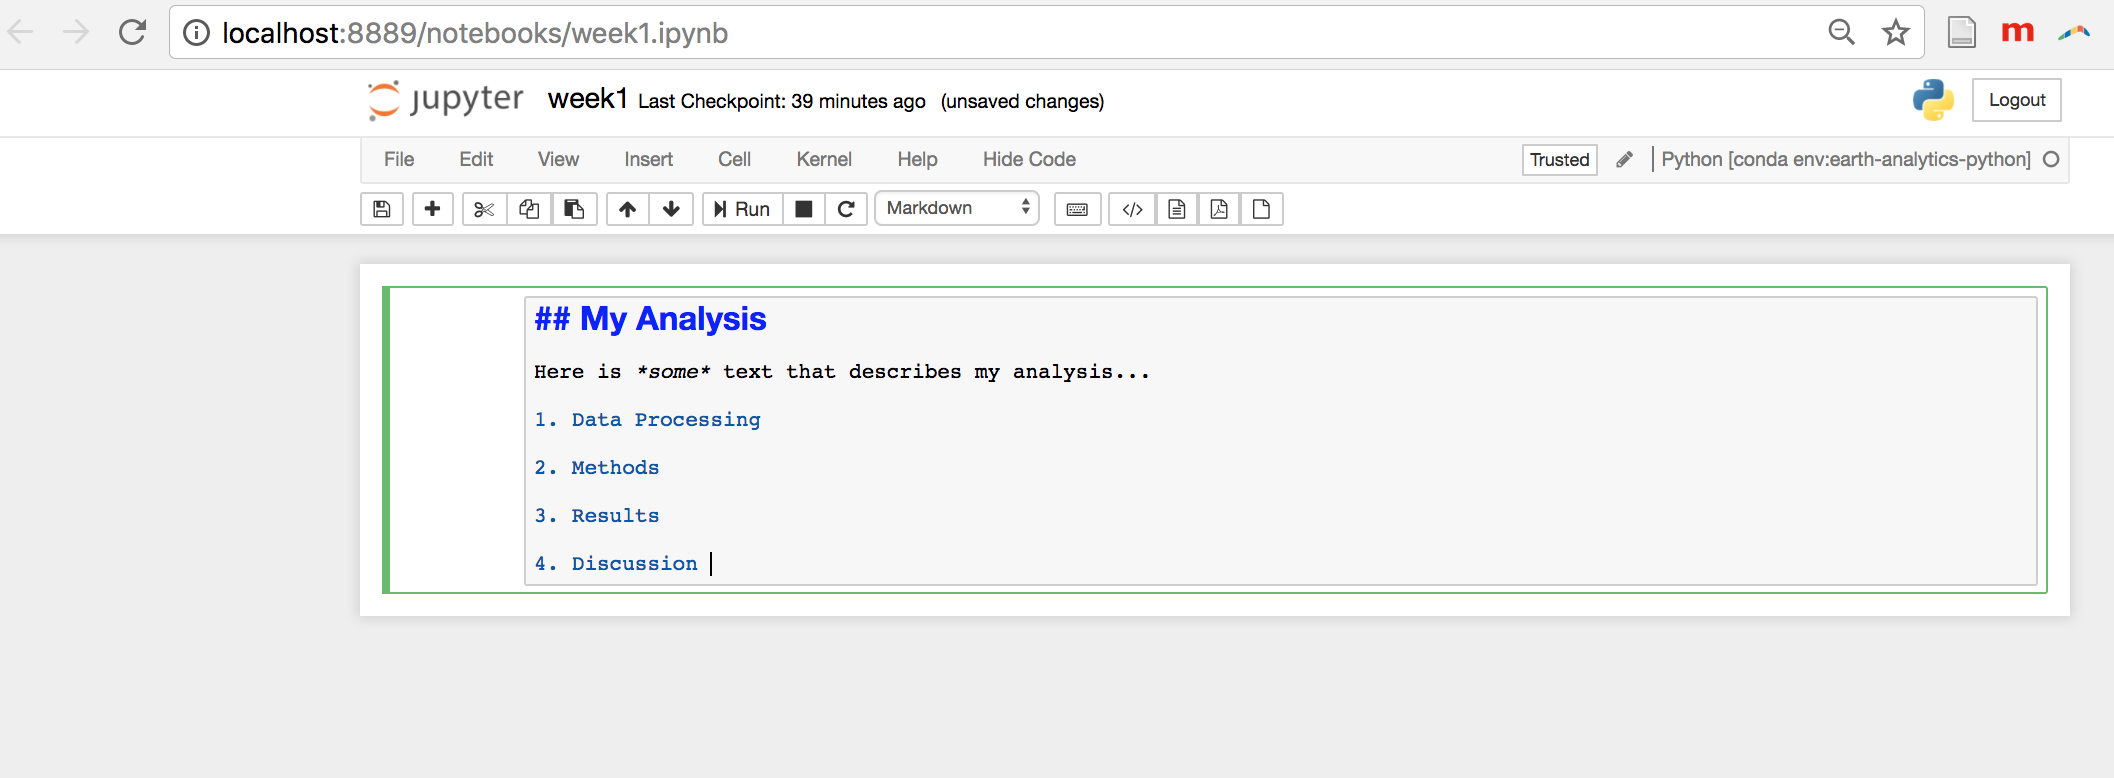
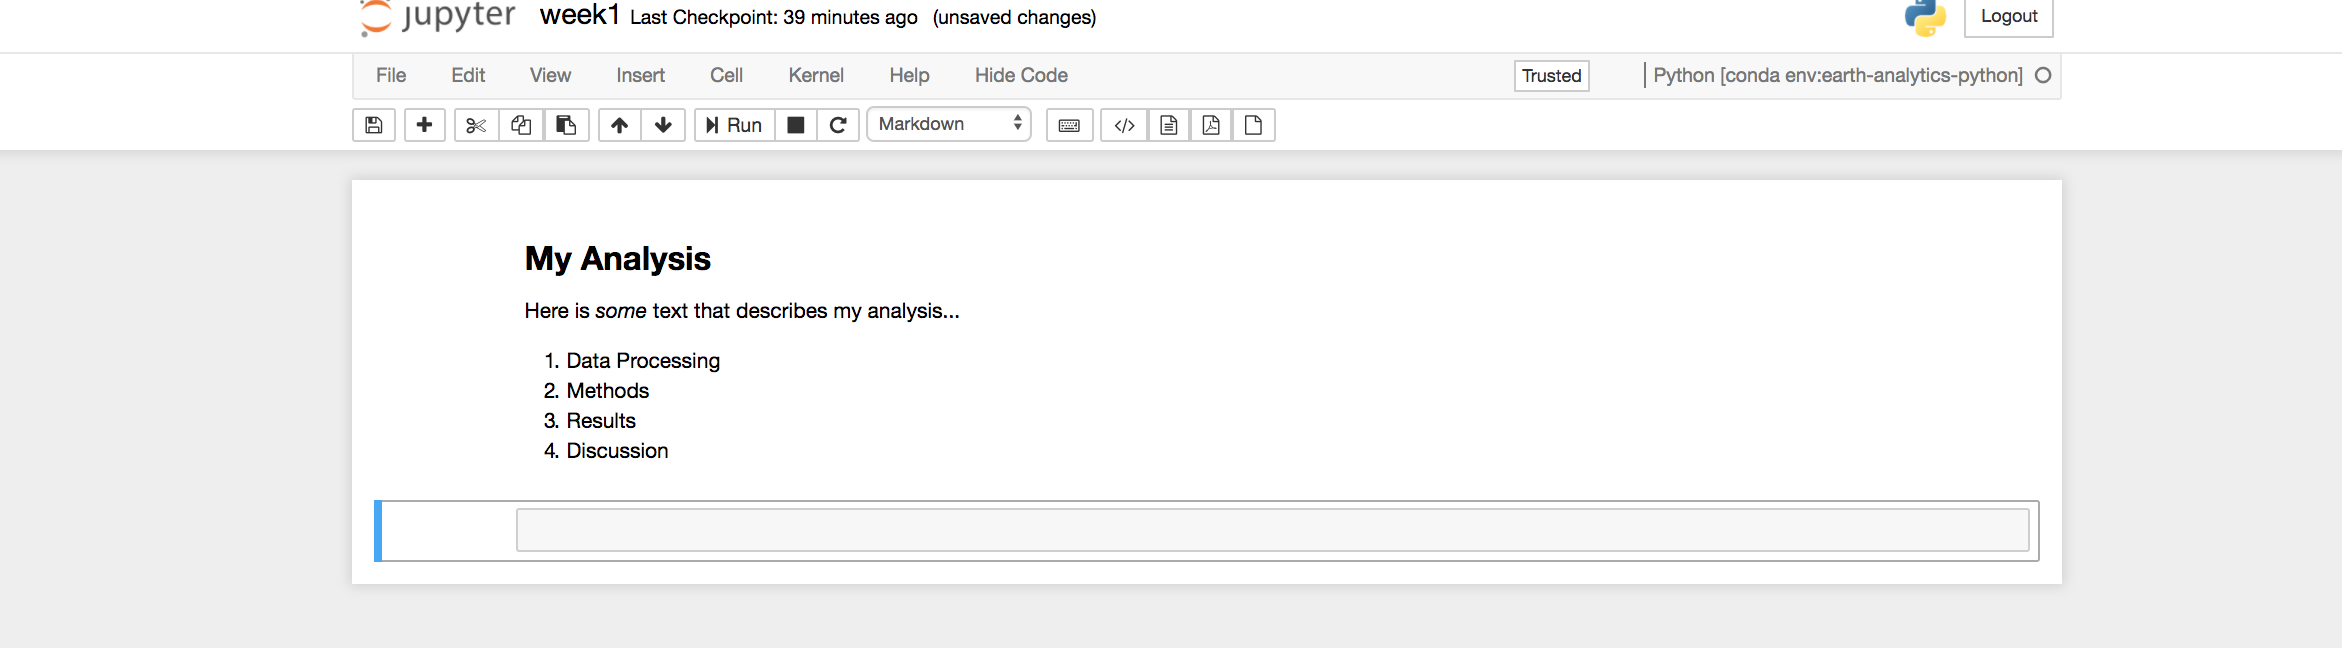
You can run code (e.g. Python) using the Code cells in Jupyter Notebook.
Code is written in code chunks. When you run the code in a Code cell, the code output displayed below.

You can check the cell type of any cell within a Jupyter Notebook by clicking in the cell and looking at the Cell Type in Toolbar.

In the next sections of this chapter, you will learn how to run cells and add new cells to your Jupyter Notebook file to build out your workflow.
Share on
Twitter Facebook Google+ LinkedIn
Leave a Comment